Showing posts with label assemblage. Show all posts

Saturday, November 8, 2008

Steampunk? What the Heck is That?

All over Etsy there are shops selling steampunk jewelry and fashions and there are pictures on flickr with groups just for steamy stuff. All of the sudden I started seeing this "steampunk" term every where and I had no idea what it meant, but it seemed artsy so I wanted to know!

Wikipedia says,
"Steampunk is a sub genre of fantasy and speculative that came into prominence in the 1980s and early 1990s. The term denotes works set in an era or world where steam power is still widely used—usually the 19th century, and often set in Victorian era England—but with prominent elements of either science fiction or fantasy, such as fictional technological inventions like those found in the works of
H. G. Wells and Jules Verne, or real technological developments like the computer occurring at an earlier date. "


Well, I guess we've all seen fantasy/sci-fi movies seem to take place in the past but with modern tools and fictional modes of transportation at hand. For example, here are some recent movies in the steampunk genre ... Sleepy Hollow, Wild Wild West, Hellboy 2: The Golden Army, Around the World in 80 Days, Sky Captain and the World of Tomorrow, The League of Extraordinary Gentlemen, Lemony Snicket, Van Helsing.

As I researched steampunk, I found there is a subculture of people who are really into it as a lifestyle with role playing, magazines, etc. It's sort of like how trekkies, renaissance faire lovers and S.C.A. members have their own little parallel world where just for a moment, they can be someone else living in a different time and place.

OK. So how does that translate to fashion, art and jewelry? Well, pretty interestingly actually. Gears, cogs, clock parts, Victorian lace, old leather bomber jackets, aviator goggles, monocles, antique brass filigree, corsets, computer parts, etc. are brought together to make things that are a mix of old and new with a semi-dark whimsy.

Here's an example of steampunk jewerly I saw on Etsy that got me interested in finding out what it was all about... See
Mad Art Jewelry


Also see
Mad Art Jewelry on flickr and check out 19 Moons on flickr too. (Note: The Winged necklace at the top of the page is by this artist)

There are many Etsy (and Ebay) sellers who specialize in the steampunk look too like
COGnitive Creations, E.D.M. designs, Ruby Ann Designs, 19Moons, etc.

If you are interested in making some of your own steampunk jewerly, just search on 'steampunk' or cogs on Ebay. Also check
Etsy Suppliers. Earthenwood Studio offers ceramic steamy stuff. Brass filigree seems to be a key component too and there are many sources. Vintaj is kind of pricey but they have aweseome stuff. Try Trinity Brass Co. Go to Search Etsy & Ebay Stores like B'Sue Boutique too. Ooo... And pretty blogs are all around for inspiration. Look at this post from Star of the East and Earthenwood Studios.

In the end, I don't think the steampunk look or lifestyle is for me personally, but it is visually interesting and so creative. I am in awe of the wearable art the featured designers have made.


Saturday, July 26, 2008

Collaging Freely with Constraints - Collage with Freedom of Expression While Using Instructions

When I boil it down, the most constant thing about the art I produce, buy or drool over is that it all contains elements of collage, and usually incorporates text or handwriting. For years I have made cards and gift tags using pretty papers in layers then rubber stamped with multiple designs and distressed and aged them with paints and inks. Then I always like to add a dimensional embellishment or two. When I make my fine silver jewelry using metal clay, I treat it almost as I do paper by layering multiple rubber stamped images, text and textures behind an element that has dimension. I often embellish with a sparkly stone and distress & antique it. This is collage, but my 'paper' is silver clay. My soldered microscope glass pendants & several of the other pieces I offer are obviously just collage art sandwiched between glass. Even in my fine art paintings and photography... there is always text, texture, layers, antiquing, and distressing going on. Heck, I think I love Photoshop because it allows me to collage digitally.

FREEEE-DOM!!! (Shouted like Mel Gibson in Braveheart) The best thing about collage is it is so free!! There is no right or wrong way to do it. Also, there's no true planning or pattern needed unless you want to do it that way. Never one for reading instructions or recipes, I love to just dive in and see what happens. Collage is always a surprise in the end.

There are some people who appreciate collage but find it difficult to do collage because it is so free. Some feel more comfortable having a set of instructions to go by. A lot of people are perfectionist and like things aligned perfectly, etc. For those folks, here's a technique to try that will having you collaging freely while providing the comfort of following instructions at the same time:

Little Squares Collage
Materials:
8x10" or larger piece of water color paper, canvas or board for base
Matte Decoupage Medium
Small foam brush, paint brush, old tooth brush
Acrylic paint in white and 2 colors (any colors but black or white - close your eyes and pick)
Permanent black ink pad (Like "Stays-On" brand)
Pencil
Old magazines or books
Masking tape, Staples, needle & thread or eyelets for non-glue connection
2 or more pieces of patterned scrap booking paper that match your 2 paint colors
2x2" paper punch or scissors and ruler
2x2 piece of solid color textured fabric (burlap, velvet, denim, fake fur, felt, lace) in matching color

Instructions to follow (or not):
1. Paint your base with one of your paint colors. Before it dries, use a medium brush to paint 4 quick & dirty circles as big as will fit on the base side by side with the other color of paint. Smears and accidental paint blending is good! When the paint is dry, quickly pounce & swipe your black ink pad here and there on the background then lightly daub it all around the outer edge of the base.
2. Use paper punch or scissors to cut out 2x2" size:
3 squares of paper that are more than 70% black text on white from a book or magazine. Try to get a variety of text size and fonts.
*6 squares from your scrap booking paper
*1 square that contains a human element such as an eye, hand, foot or face.
*1 square filled with a natural element image (sky & clouds, water, a leaf)
*1 square of fabric
3. Run the edges of all of the papers across the black ink pad quickly. Don't be too careful.
4. Use the foam brush to paint a thin layer of decoupage medium to adhere squares to the base in this manner:
*Place squares in rows - 3 squares x 4 squares like tiles leaving a space between the squares. (You can be as careful or carefree as you want while spacing these out.)
*In each of the rows containing 4 squares, place one of the text squares, 2 scrap booking paper squares and one of the single squares (human element, nature element, fabric*) in any order.
*For fabric, the rule is you must connect it in any way other than glue and the connection method must show. You can staple, stitch, use eyelets, use masking tape to tape around the edges, etc.
5. Use a pencil to write the following in cursive any scrapbook paper square:

*Any verb
*Any noun

*Any adjective

6. Cut out words or letters from book/magazine to form a 3 word sentence about any human emotion, action or trait (examples: "I was dreaming", "Then she smiled.", "I cried out.", "I crave popcorn.", "He was strong.", "She hates Paris.") and decoupage it to a scrap booking square.
7. Mix a blob of white paint with water on a plate so that it is about as thick and 1/2 and 1/2 creamer. Dip a dry toothbrush in the paint. Point the end of the toothbrush at your collage keeping it around 4 inches away, then rake the bristles towards you with your finger or the end of another brush. This should cause little speckles of paint to flick on to the collage. Move the brush to another area and repeat 2-3 times.
8. When the specks are dry, sign the piece with permanent ink pen then brush the whole collage (except for the fabric) with decoupage medium using criss-cross strokes. If the pencil or magazine blurs or there's bubbles, it's OK!
9. When the medium is dry, crinkle up a paper towel or sheet of paper and dampen it slightly. Then dab it on the black ink pad. Lightly swipe it across the surface of the collage randomly to antique portions of the top coat.

Voila! You just made a piece of collage art!

If you like the look of warm, nostalgic & antique-ish art, just change the above instructions as follows:

  • Select honey gold and chocolate brown paint.
  • Use Walnut brown ink instead of black
  • Spatter and swipe with creamy ecru paint instead of white
  • Use vintage sepia photos, text from old yellowed books and vintage ad print instead of modern magazine clips
  • Use vintage motif scrapbook papers or old maps.


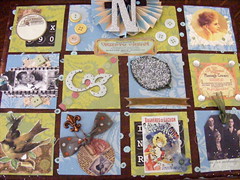
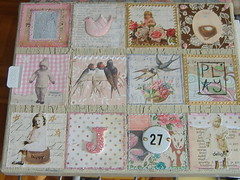
Here's a couple of examples of cool collages found on flickr using a somewhat similar technique. (Click on the links to visit the artist's page):


Collage Received
Originally uploaded by sixaguilars