Wednesday, March 26, 2008

Light is a Crafters Best Friend - The Benefits of Full Spectrum Light

"And God said, let there be light and there was light. God saw the light and it was good." Gen. 1:3-4

Light is good. Our bodies are built to use light... We obtain essential vitamins from the light of the sun. People who live in darker climates tend to have a higher percentage of vitamin D deficiency and become depressed and are sometimes diagnosed with SAD (Seasonal Affective Disorder). Our eyes need light to focus. People who work in low light conditions consistently over time experience eye strain and tend to loose their eyesight at a faster rate than average.


For the artist and crafter, light has great importance too. Needlework, beading, and other detailed handywork requires good eyesight and precision movements to obtain the best result. It may seem obvious, but the essential tool for the aforementioned, is LIGHT.

Light is also a necessity to the artist because it produces shadow and contrast that are necessary for dimension. Also, light impacts our perception of color. All color is simply the absence or presence of color that is carried to our eyes receptors by the light reflecting off an object.

There are all kinds of light and they all impact color perception greatly. The best light for artwork mimics natural daylight which is "full spectrum light". Full spectrum light is the most accurate. Most indoor light can have a very yellow or blue cast. Florescents give a green or purple cast. Full spectrum light appears as pure white light.

The OTT-LITE is one brand of full spectrum light that seems to target towards us crafty folks. They even have models with built in magnifying glass for detail work. I have seen rave reviews in many articles & blogs I have read. They are eco-friendly products & scientifically tested per this article. There are many styles available that seem to accommodate any kind of craft room or work area. They are pretty pricey, so, until this sale, I have not ordered one. 40% off is awesome! Bulbs on sale too! Use this link to go straight to Joann and order one if you are interested. The sale ends 3/29/08. Plus FREE shipping for orders over $35 with this code SAD090 through the end of March. I think there is another sale in April too. Check back if you miss this one!

40% OFF OTT-LITE® Products at Joann.com

Buy Handmade from Etsy - What's an "Etsy"?

In case you did not know it, there is a revolution going on. The movement to buy handmade is growing. People are sick of the mass produced low quality items they see in stores. Thousands are literally making a public commitment to buy handmade. There are many blogs and sites devoted to promoting this trend and I think it is great. Viva la revolucion!

In fact, a new buzz word has been coined as a result of the movement - "Craftivism".

The reasons people give for buying handmade from indie artisans are many, but here's a few that I have seen:

  • Better for the environment - No factories, etc.
  • Does not promote bad labor practices/slave labor
  • Can get better quality items
  • Like one-of-kind, unique things
  • Keeps crafting and hand work from becomeing a dying art
  • Promotes "Made in America"/country pride
  • Supports a new generation of crafters
  • Better value - Get more for your money
  • Promotes the "little guy"
  • Crafts are a true reflection of a culture throughout history


Etsy ("Pronounced ett-see") is definately on the forefront of the movement. "What's an 'Etsy'?" you ask. Well, Etsy is a wonderful online community/store/street fair/swap meet/meet & greet where crafty and artistic people from around the world sell their handmand items to people who truly recognize & appreciate the work of an atisan when they see it. A huge number of people sell via etsy including me - My store.

Here's a video talking about how it started. This is now a really big deal. They pretty much set the bar for buying and selling handmade on line. Recently, the founder was featured on Martha Stewart show and I have seen Etsy mentioned in many, many magazines.


Here are some other members of the handmade consortuim:

Craftster.org
indiepublic.com
Craft:

Please buy handmade! Thanks!

Sunday, March 23, 2008

How to Make Jewelry from Glass Microscope Slides & Solder

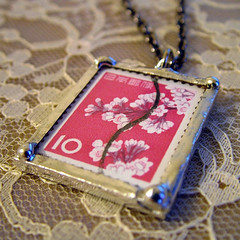
If you are into handcrafted jewelry, then you may have already seen or heard of jewelry made by using 2 glass microscope slides to sandwich flat items, which are then soldered around the edge to make a solid piece. Loops are soldered to the top and/or bottom to act as connection points. These are mini framed pieces of art that are as much fun (with practice) to make as they are to look at and wear.

Sample pic is from flickr user "Ashe-villain" who allowed the blogging option (thanks). Visit her store.

What do you need to create this fun art you can wear?
Microscope Slides or other polished edge small uniformly shaped glass piece
Glass cutting tools (optional - only if you want to do a size other than your pre-cut glass)
Stuff for inside the "glass sandwich"
1/8" Copper tape - the type used for stained glass
Burnishing tool
Shiny silver jewelry grade Lead-free solder and compatible flux that matches temp of soldering iron
Small disposable non-plastic paint brush to apply flux
Wire or jump rings
Pliers
Damp Sponge
Glass cleaner and lint free towel
Soldering Iron & sturdy stand
High heat resistant work surface
Well ventilated space
Clamps or "third hand" tool to hold the slide in place while soldering
Safety goggles

Instructions

What can you put inside the slide sandwich?

The possibilities for what you can put inside is limited only by the fact that it must be pretty thin flat, and able to stand the heat of the soldering iron near it. I have seen paper collage, feathers, lace, photos, pressed flowers, glitter, confetti, snips of hair, poems, postage stamps, fabric & fiber, food labels, sheet music, on and on... One thing to note, make sure objects do not contain any moisture, as in wet glue, when you solder. The heat may cause steam to get trapped in side and will ruin your project. Don't get anything that melts or burns easy close to the edge of the project so the heat will not harm it.

End of Part 1.

Go start collecting stuff to put in your slide sandwich and check back here soon for part 2!! Part two will feature more instructions, samples and resources for where you can get the supplies mentioned above.


Wednesday, March 19, 2008

Open For Business - Tree By Sea Jewelry and Gifts

It's official. My jewelry shop Tree By Sea is now open for business. Only 11 items in there so far, but more coming soon!


Here's a peak:


Keep checking back for new items!

Thanks!

Paper-o-holics & Card Makers-Impress Your Friends and Yourself with Pretty Dalia Folding!

If you you are a rubber stamper, scrapbooker or paper-o-holic like I am, you probably already have a ton of pretty papers just waiting to be turned into something wonderful! How 'bout something dimensional that will pop off the background of a card and grab the viewers attention? Sound good?

There are several paper folding methods out there that are simple to learn which turn out great results that usually really impress the heck out of card recipients. I think most of the folds are generally refered to by the umbrella term "Tea Bag Folding". "What's that?" you say...


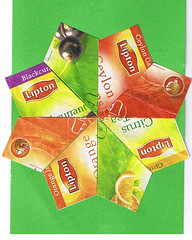
tea bag folding
Originally uploaded by
taavina
Well, according to various web sources, Tea Bag Folding (AKA miniture kaleidoscopic origami) was created in Holland by a lady who got creative with some colorful square tea bag envelopes she had sitting on her table. She folded each one and then combined them in a way that when they interlocked, they created a symmetrical medallion design. This has evolved into a big thing with many fold and connection patterns & specialy papers now available offering endless possibilities.

Here is a site with many links to patterns and resources for traditional folding with square piece of paper or teabags: TEA BAG FOLDING


My friend Sharon Mott recently introduced me to the "Dalia Fold" which is similar to teabag folding but uses circles instead of squares. I think her cards are really beautiful. Don't you agree?


Try it...

What you will need:

  • Pretty double-sided paper for the dahlia
  • Coordinating paper for the background
  • 1.5" circle punch or circle cuter
  • Paper Glue Stick (I recommend UHU)
  • Button or rhinestone for the center
  • Bone folder (optional, but helps make crisp folds)
  • Premade card blank & envelope
  • Illustrated instructions
I hope you try this fun project. If you do, please pop back by and leave a comment and link me to a pic of your work. I would love to see it! HAVE FUN!!

Sunday, March 16, 2008

Silver For Sale in My New Jewelry Store... Opening Soon (I hope)

Happy Weekend! Too bad it's almost over. Well at least I finally had some time to start taking some photos of my work for my online jewelry store that I will be opening soon. I will be selling my pure fine silver metal clay jewelry, charms & beads as well as beaded & glass jewelry under the name "Tree by Sea" (I think) on Etsy.com.

In the interim, if you see something here you are interested in, please contact me direct for pricing & purchase information. Lisa@kamerakat.com THANKS!!

I will send announcements when the store is officially up and running!

Here's my store header:


Here's a few sample shots. Hope they look OK.


Saturday, March 15, 2008

Metalsmith With Natural Found Objects

Hello,

Just a quick post for now...

Here is a video that is a short introduction to jewelry artist Laura Crawford of "Tangerine Tree House" that I found featured on Etsy.com. It is showing how she became inspired to move beyond bead stringing into something that she felt allowed her to be more creative...metal smithing. I like the video because it is well done and because I can sort of relate. I recently found that I was ready to move beyond regular beading into something a little different too. For me, I selected silver metal clay as a new form to explore.

Laura is inspired by found objects and nature. I am inspired by nature as well, so again, I related to her story.


Wednesday, March 12, 2008

Yay! My work is now part of a corporate art collect

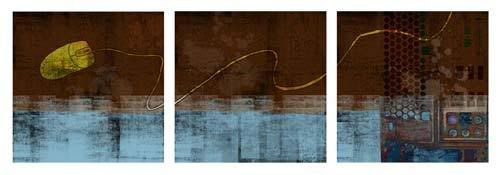
Hey! Just a quick self back-pat. I'm very excited that a northwest company purchased some of my artwork for their home office corporate art collection. It is a 3 piece set titled "Moutisse 1, 2 & 3".

Here it is:
Photobucket

The fine art giclee is available as a one print tryptic or as 3 separate prints with optional custom framing in my ImageKind Gallery.

Here it is in the space:


Photobucket

Thursday, March 6, 2008

How to Take Better Photos for Scrapbooking, Part 2

Hey there photo phriend! In yesterday's "How to Take Better Photos ....Part 1", I talked about 8 tips to improve the photos you will be scrap booking. I have a few more tips that will surely help most of us take "photos" rather than "snapshots".

FYI - though the focus of the articles is for scrap booking pix, the truth is these tips apply to anyone for all photos for pretty much any situation, whether the photo will be scrap booked or not.

Please review the steps in "Part 1" and then let's pick up where we left off... Here we go!

9. Pay attention to the background. Try to position the subject or your body and the camera so that the background that will show in the picture is not distracting. Try to avoid extra clutter in the picture that could detract from the subject. If you are able to adjust the aperture on your camera, use a very wide aperture (low number) to turn the background into a nice silky blur.

10. Use the flash outdoors when taking people pix. I know in a previous step I said to avoid using the harsh light of the flash, but outdoors the light is dispersed enough so that it just fills in the shadows on nicely. Also, if you are somewhat close to the subject, a flash can stop motion blur. For example, take a pic of a flower blowing in the wind using the flash to freeze the image for a split second.

11. Focus on focus. I know that it seems obvious. Of course you have to focus! Right? But, sometimes we get so excited to capture a picture we don't pay attention to which part of the picture the camera is focused on, then when we see the resulting pics we are disappointed to find that a unimportant part of the photo is tack sharp while the subject is blurry.

12. Be aware of shadows. They can be an interesting feature or ruin a picture. It's cool to capture the elongated shadows of trees & people when the sun is low in the sky. It is usually not cool to have an unintentional shadow covering 1/2 of the subjects face. In situations where there is a partial shadow that cannot be avoided, use the fill-flash (item 10 above)

13. When possible, use leading lines to draw the viewer in to the photo. Lines that start near the lower corner of a picture, continue to the subject or diminish in to the distance help to pull the eye into the photo.

14. Use a tripod, especially when there is low ambient light. The lower the light, the slower the shutter which means if your hand shakes at all the picture will be blurry. Built in anti-shake features found in cameras and lenses help, but there is no substitute for a tripod in low light.

15. Love your camera. Hug it, learn it, keep it clean. After all, it's THE tool required to take good pix, ya know? Learn how and when to use all the settings and features of your camera. Read the manual and play around to see what the settings do. Maintain the camera by keeping it dry and store in a stable temperature. Carry in a padded camera bag. Keep batteries charged and store them outside of the camera if you will not be using it for a while. Protect LCD's with clear protective stick-on covers. Be really careful not to get dust or scratches on the lens. Clean it carefully and often with a cloth or tool designed especially for cleaning lenses. Never clean with tissue, paper towel, etc. All of this is pretty basic, but it is important so worth mentioning.

Here's a few pictures that are good examples of what is covered in this blog and Part 1:


Why it's good: LEADING LINES & OFF CENTER SUBJECT


leading line
Originally uploaded by audi_insperation


Why its good: INTERESTING USE OF SELECTIVE FOCUS


"B" is for Bokeh
Originally uploaded by Steve Pearce


Why it's good: UNCLUTTERED BACKGROUND, OFF-CENTER, UNPOSED PICTURE, GOOD SIDE LIGHT


Argenit's First Portrait
Originally uploaded by azem


Why it's good: RULE OF THIRDS APPLIED. (Subject is placed at one of the four intersections where the lines meet.)


Rule of thirds
Originally uploaded by Pablo Montesdeoca


Why it's good: INTERESTING CROP + FUN COLOR/FILTER APPLIED IN PHOTO EDITOR


Rockstar
Originally uploaded by maureenwilson

Wednesday, March 5, 2008

How to Take Better Pictures for Scrapbooking, Part 1

What makes a page POP!?

If you are in to scrap booking or thinking about scrapping to do something cool with that giant box-o-pics you have at the bottom of your closet, then you have probably spent some time looking at other peoples scrapbook pages for ideas and inspiration. I'm sure you have admired the colorful papers and embellishments, and journaling, but I am willing to bet that the pages that truly 'grabbed' your heart the most were the ones with one or two quality photos where the photos were the star of the page. Right?

So now let's think about this.... What makes a quality "photo" vs. a snapshot?


Here are some really high-level, simple rules that will immediately improve most photos:

1. Fill the frame with the main subject. Get close or zoom in.
2. Take candid shots instead of rigidly posed shots.
3. Take the photo at a fun angle. Don't take a picture standing with the camera straight on every time. Tilt the camera, hold it high and have the subject look up, hold it low and angle up to the subject. Get down on the ground with kids and pets.
4. Don't force a smile. The most moving images are when the person has a natural expression.
5. Catch mid-giggle pics of kids.
6. Make sure there is lots of natural light. Avoid the harsh light of the flash whenever possible. Daylight with the subject near a window works great or outdoors on overcast days or at sunrise/sunset when the light gives the subject a warm glow.
7. Don't center the subject in every shot. Move the camera so that the main subject is off to one side. Also, don't center horizon lines when taking outdoor shots. Follow the "Rule of Thirds".
8. Use interesting crops to show just a portion of the photo, like maybe the whole body without the head in the frame, or just show the hands or feet.

and more...

Please check back to this blog for photography tips on how to take better photos part 2 coming soon.

Here is an example of some pages found on flickr that I think exemplify some of the tips mentioned above(permission to blog granted by the owners):


The pages above, IMHO, are embellished in a way to bring the photo more attention vs. draw attention from it. The memory is the foremost subject of the page, and that is what tugs at our hearts, makes us smile, or gives us warm fuzzies!

More tips coming soon! Subscribe to get automatic updates!

Monday, March 3, 2008

Super Smart Unmounted Rubber Stamps Storage!

All of us diehard stamp-o-holics tend to accumulate an abundance of unmounted rubber art stamps as we progress deeper and deeper into our stamping obsession. We all start out buying one or two mounted stamps, and before long we have large storage bins or shelves full. Then we move on to the "hard stuff"... Unmounted rubber stamps.

At first you say, "I'll just buy one". Then you say, "Well, they cost so much less than mounted, I can get two for the price of one, so I will get two." The next thing you know you are up to buying whole sheets at a time.

One day you will stop and take a long hard look around you and discover you are up to your ears in unmounted rubber stamps and that it is a real pain to dig through the pile to find just the one you want. What to do? What to do?

Well, I found this wonderful YouTube video from pinkcatstudio that has storage solutions that are pure genius!


Check it out:


Note regarding the CD jewel cases...A responder to the video post wrote, "This is a well made well presented video. One word of caution CD cases and similar storage methods are highly acidic. Over a number of years this could cause your stamps to deteriorate."

I cannot say for sure if this is true, but it might be. A possible solution might be to use heave archival paper to line the case??? I am not sure, but for a temp solution, it sounds great to me.

Saturday, March 1, 2008

I think I'm gonna dig this metal clay stuff...

I have made beaded jewelry & mixed media jewelry for years, but what I really wanted to make is what I really like to wear - Silver Jewelry. I have looked into metalsmithing classes and working with Sterling silver, but it all seemed to overwhelming and time consuming, and I already am running low on time most days. So, I thought silver was out of the question.

Then a few years ago I started hearing about this stuff called "Precious Metal Clay" or "PMC". I heard you formed it just like clay & then fired it in a kiln and it turned in to 99.9% pure silver. Say what?! No metalsmithing classes required? No scary jewelers saws and bench-vises needed? No smelting & pouring of molten hot liquids? Yahoo!!

The I started checking in to it and it seemed like such a big investment to try a hobby I didn't know that I would be good at... $700 kiln, $300 for a 1-day class at my local bead store or college, $80 tumbler, $200 in misc tools, shapers & files, and then the ongoing expense of the clay in it's various forms... It's not that cheap - It is silver, ya know? And, on top of that, I heard the jewelry was really soft & semi-fragile and the clay shrunk un-predictably when firing so rings were not recommended, which is of course, what I wanted to make the most.

Another couple of years past before I took a second look at this media. There was now more choices. There was another manufacturer "Art Clay", and there was "Low-Fire clay" that cintered (became solid silver) at a temperture & speed that allowed it to be fired easily by a $40 torch vs. $800 kiln. On top of that, the shrinkage was lower and predictable. The resulting fired metal was stronger. And there was "Slow-Dry clay" that allowed more working time to make things that are more time consuming such as rings. YAHOO for real this time!


So I bought a book called "The Art of Metal Clay" by Sherri Haab. The next thing I knew, I had ordered a starter kit. And I made my first pieces. OK, not perfect, but it was silver, it was made by me, and I was hooked.

Fast forward to now... I now have invested in that $700 Paragon kiln and the aforementioned tools & tumbler because working with these items expands what I am able to do with the media & is frankly faster & easiler on the carpal-tunnel so I can make more pieces.

Little by little I am learning how to read the material and keep the moisture of the clay just right & how to work it in the fragile 'greenware' stage. I have learned what stones & types of glass can be fired in the kiln with the clay. And I am learning how to antique with Liver of Sulfer patina and bring the silver to a shine with polishing.


I really am beggining to love this media with only a few negatives...
  • There is a learning curve if you want to make quality, detailed pieces.
  • It is a bit costly and as the cost of silver rises, it will only get worse.
  • It is not metalsmithing, but it helps to learn some basic metalsmithing techniques.
  • It is takes quite a bit of time to make a highly detailed & polished piece.
  • It a bit dusty and dirty. You should wear a high-quality dust mask and goggles and work in a well ventalated area.
  • It's addicting

So far I have only made pieces for myself and family to learn this new skill, but am now working on some pendants that will be for sale through my Etsy store soon. Please keep an eye out! Thanks!

So that is my story regarding silver clay. If you would like to give it a try, all of the supplies listed above in BOLD and more are available from the links and "I recommend" shopping widget on the sidebar of this blog.