
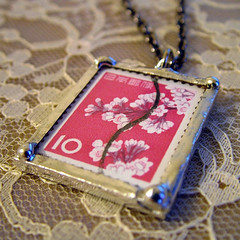
If you are into handcrafted jewelry, then you may have already seen or heard of jewelry made by using 2 glass microscope slides to sandwich flat items, which are then soldered around the edge to make a solid piece. Loops are soldered to the top and/or bottom to act as connection points. These are mini framed pieces of art that are as much fun (with practice) to make as they are to look at and wear.
Sample pic is from flickr user "Ashe-villain" who allowed the blogging option (thanks). Visit her store.
What do you need to create this fun art you can wear?
Microscope Slides or other polished edge small uniformly shaped glass piece
Glass cutting tools (optional - only if you want to do a size other than your pre-cut glass)
Stuff for inside the "glass sandwich"
1/8" Copper tape - the type used for stained glass
Burnishing tool
Shiny silver jewelry grade Lead-free solder and compatible flux that matches temp of soldering iron
Small disposable non-plastic paint brush to apply flux
Wire or jump rings
Pliers
Damp Sponge
Glass cleaner and lint free towel
Soldering Iron & sturdy stand
High heat resistant work surface
Well ventilated space
Clamps or "third hand" tool to hold the slide in place while soldering
Safety goggles
Instructions
What can you put inside the slide sandwich?
The possibilities for what you can put inside is limited only by the fact that it must be pretty thin flat, and able to stand the heat of the soldering iron near it. I have seen paper collage, feathers, lace, photos, pressed flowers, glitter, confetti, snips of hair, poems, postage stamps, fabric & fiber, food labels, sheet music, on and on... One thing to note, make sure objects do not contain any moisture, as in wet glue, when you solder. The heat may cause steam to get trapped in side and will ruin your project. Don't get anything that melts or burns easy close to the edge of the project so the heat will not harm it.
End of Part 1.
Go start collecting stuff to put in your slide sandwich and check back here soon for part 2!! Part two will feature more instructions, samples and resources for where you can get the supplies mentioned above.


3 comments:
Thank you so much for posting this! I've been trying on Etsy and anywhere else to find why and how moisture is getting between my slides.
You answered that. Even though I let my diamond glaze dry thoroughly, it still wasn't dry enough. And I think I'll start coating the outside with it, too, before putting on the copper tape.
Wow,
This is great mixing of jeweleries
and also superior products.
silver jewelry exporters
Hi, very informative blog got good information about microscopic slides. These are a really very useful equipment in medical
field.
Post a Comment